Note: If you do not have a cell phone, contact the IT Service Desk at 864-646-1779 or servicedesk@tctc.edu to discuss options.
If you are setting up multi-factor authentication for the first time, and you are using an anonymous VPN service (such as NordVPN, Mullvad VPN, iCloud Private Relay, etc.), you must disable your VPN before setting up MFA to prevent any issues during setup.
To set up the Microsoft Authenticator app
First Time Students:
On your computer:
- Log in to my.tctc.edu with your Tri-County Technical College E-mail and the Password you created.
- On the Start by getting the app page, select Download now to download and install the Microsoft Authenticator app on your mobile device, and then select Next. For more information about how to download and install the app, see Download and install the Microsoft Authenticator app.
- If you want to use an authenticator app other than the Microsoft Authenticator app, select I want to use a different authenticator app.
- If your organization lets you choose a different method besides the authenticator app, you can select I want to set up a different method.

- Remain on the Set up your account page while you set up the Microsoft Authenticator app on your mobile device.
- Go to myaccount.microsoft.com and sign in using your TCTC account.
-

- Select Security info in the left menu or by using the link in the Security info pane. If you have already registered, you'll be prompted for two-factor verification. Then, select Add method in the Security info pane.

- On the Add a method page, select Authenticator app from the list, and then select Add.
- On the Start by getting the app page, select Download now to download and install the Microsoft Authenticator app on your mobile device, and then select Next. For more information about how to download and install the app, see Download and install the Microsoft Authenticator app.
- If you want to use an authenticator app other than the Microsoft Authenticator app, select I want to use a different authenticator app.
- If your organization lets you choose a different method besides the authenticator app, you can select I want to set up a different method.
- Remain on the Set up your account page while you set up the Microsoft Authenticator app on your mobile device.

- Open the Microsoft Authenticator app, select to allow notifications (if prompted), select Add account from the Customize and control icon on the upper-right, and then select Work or school account.
Note: The first time you set up the Microsoft Authenticator app, you might receive a prompt asking whether to allow the app to access your camera (iOS) or to allow the app to take pictures and record video (Android). You must select Allow so the authenticator app can access your camera to take a picture of the QR code in the next step. If you don't allow the camera, you can still set up the authenticator app, but you'll need to add the code information manually. For information about how to add the code manually, see see Manually add an account to the app.
- Return to the Set up your account page on your computer, and then select Next. The Scan the QR code page appears.

- Scan the provided code with the Microsoft Authenticator app QR code reader, which appeared on your mobile device after you created your work or school account in Step 6.
- The authenticator app should successfully add your work or school account without requiring any additional information from you. However, if the QR code reader can't read the code or you are on your phone while going through this process, you can select Can't scan the QR code and manually enter the code and URL into the Microsoft Authenticator app. For more information about manually adding a code, see Manually add an account to the app.
- Select Next on the Scan the QR code page on your computer. A notification is sent to the Microsoft Authenticator app on your mobile device, to test your account.

- Approve the notification in the Microsoft Authenticator app, and then select Next. Your security info is updated to use the Microsoft Authenticator app by default to verify your identity when using two-step verification or password reset.

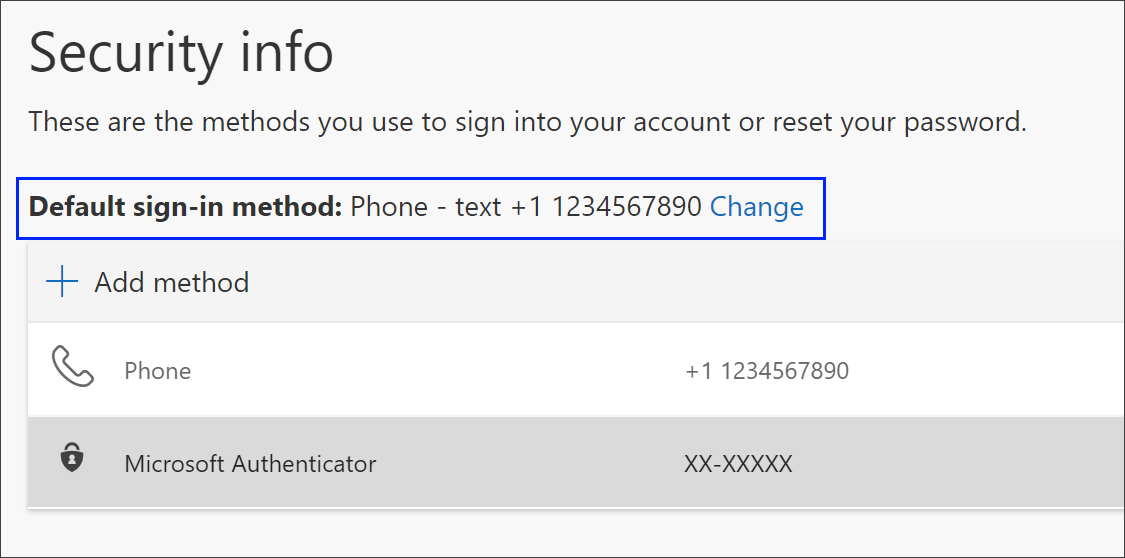
To change your default security info method
-
On the Security info page, select Change next to the Default sign-in method information.
-
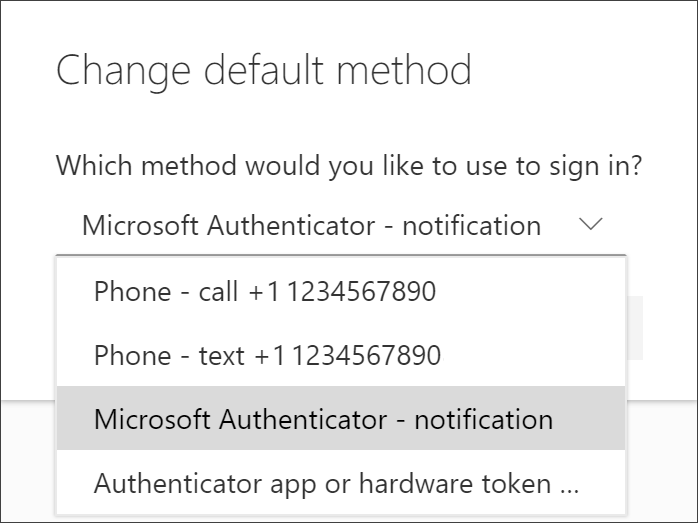
Choose Microsoft Authenticator - notification from the list of available methods. If you're not using the Microsoft Authenticator app, select the Authenticator app or hardware token option.
-
Select Confirm. The default method used for sign-in changes to the Microsoft Authenticator app.
Update your contact information with the college:
https://prodban.tctc.edu/BannerGeneralSsb/ssb/personalInformation#/personalInformationMain
2.